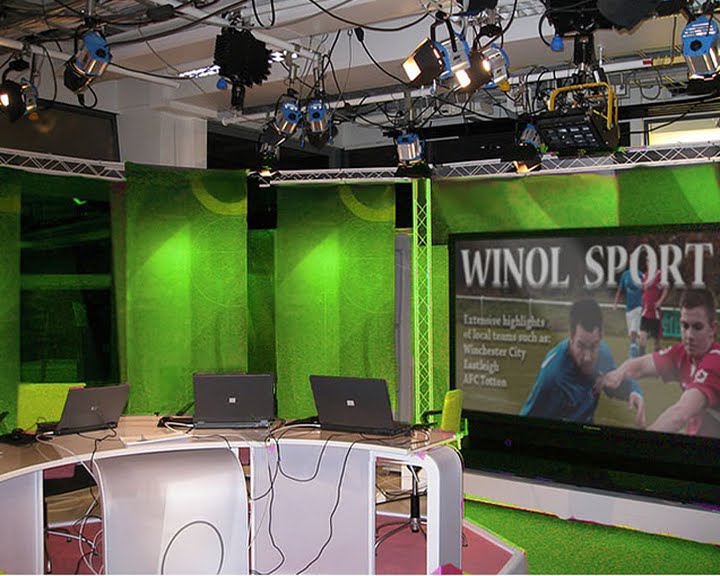
As I said in my last blog, we had a problem with all of our green screens being deleted in some way. In this blog I will tell you how to put an image on to the SD card for the Vision Mixer and I also have the pctures of our backgrounds on here so you can take them from here whenever you need to. Lastly, we now have no backrground for WINOL Life so a new one will have to be made if you carry on with it next year. You may want to make a new background for everything so that they all link. These are not perfect, especially the WINOL bulletin background as that is only a captured image but it was OK for our last bulletin as we had no time to make anything else.
"So, my only idea for making sure that we had a background for the following day would be to look though all our tapes of WINOL to find a spot where there was no-one being filmed and just an empty room with our background. It took five tapes but I finally found a tiny spot, about three seconds long that had no-one and nothing in. I captured this, grabbed it, then saved it to the desktop.
"So, my only idea for making sure that we had a background for the following day would be to look though all our tapes of WINOL to find a spot where there was no-one being filmed and just an empty room with our background. It took five tapes but I finally found a tiny spot, about three seconds long that had no-one and nothing in. I captured this, grabbed it, then saved it to the desktop.
To get the picture on to the SD card you have to open it in photoshop. You then have to change the image size to 720x576 pixels. You then need to save this as 24 bit.bit map or 24 BMP. Put in the SD card and move the background in to the file marked, 'images' and you're done. When it is put into the vision mixer it should download properly. My next blog will have the Sportsweek and WINOL backgrounds in for any future use, best to back everything up."
Hope that is OK. Here are the pictures of the backgrounds for WINOL and Sportsweek but please keep in mind you may not be able to drag them straight on to the SD card, you may have to go through the above process. Also there is no photoshop on the computers in Tab9 but there are in the MMC if you can nab a computer.

No comments:
Post a Comment