 This is just something to refer back to as there are so many wires for each of them and it can get very confusing.
 OB Kit:
For this you will need 1 x Black Cable
2x White Cable
1x Blue Cable
1x Audio box from the OB kit
1x Audio box
1x Orange extension lead
Talk Back, grey wire. In the front of the OB kit.
Microphone, in little black pouch.
1. "Audio Tie 1" links with the black cable to the microphone cable.
2. The left green wire from the cupboard links to one audio box. Then plug the headphones in to the same audio box.
3. The right green wire links with the blue cable and is plugged in to the second audio box. Plug the talk back in to this box too.
4. "Video to Studio" links with one of the white cables and goes in to the yellow hole on the camera.
5. "PGM Out" links with the other white cable and goes in to the TV box. You need to also plug this TV box in to the mains with the plug.
6. Make sure all the plugs are turned on around the cupboard. You may not always need the extension lead.
7. Turn the camera on and check the microphone and the talk back are working. You will now be fully connected with the studio.
Tricaster:
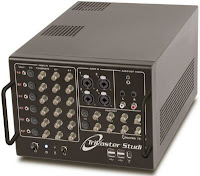
For this you will need 1x Tricaster
1x Tricaster screen
1x Internet cable
2x Plugs
1x Blue ended cable
1x Audio cable from the power tower in the gallery
1x Camera cable from the power tower in the gallery
1x Mouse linked to the tricaster through a USB lead.
1. Get all the wires out, the screen and the tricaster.
2. Plug in the tricaster and the screen with the power cables.
3. Link the screen and the tricaster together with the blue ended cable. One end goes in to the blue slot on the back of the screen and the other end goes on to the blue plug in slot at the bottom of the tricaster.
4. Plug in the Internet cable to the slot on the tricaster and to the wall in the studio.
5. From the Power tower get the camera cable and the two audio cables. Put the camera cable on to the "Y Composite" on the front of the tricaster and put the audio cable in to the top two slots on the front of the tricaster.
6. Turn the tricaster on at the back and the round button at the front of the tricaster.
7. No need to press ANYTHING else until it is fully loaded, and the gallery screen comes up.
To link the Tricaster to ustream to broadcast live or to record you need to go on to ustream.tv and login. You need to do this on another laptop. Do not do it on the tricaster and do not use the compter in the gallery because your recording from the tape deck will have the voices out of sync.
The login details are, username: WINCHESTERJOURNALISM
password: WINCHESTER1
All in capitals. Then click on the tricaster to record/stream. Click on ustream to stream and allow all options. Only click this just before you are ready to start recording or you will have a black screen for some times before your showing starts.
When saving this make sure you write something in every box as this is the only way it will save. You will then find it under, "my videos".
Good Luck.
He said that he didn't have to install any software and his web streaming software recognized the video input. He also said that Blackmagic offered some software for capturing the video, but he hadn't used that.
ReplyDeletehttp://www.americanmovieco.com